If you would like to make colorful task cards either for your students or to sell on TpT, but don't know where to start - I can help! I've been creating lessons for my students and selling on Teachers Pay Teachers for over 5 years now, and have learned a few "tricks of the trade" along the way.
I recently made the switch from creating in Word to creating in PowerPoint - and boy was that ever a good decision!! PowerPoint makes things so much easier! So to follow this little tutorial, you will need to have PowerPoint installed. I am still working off of an older version of Powerpoint (2007), so if you have the latest version, things might be just a tad different, but probably not too much.
Let's get started:
Just click on one or both of these templates, download, and open in Powerpoint
Click in the grey area of one of the task cards. You should see it framed with white dots as shown below:
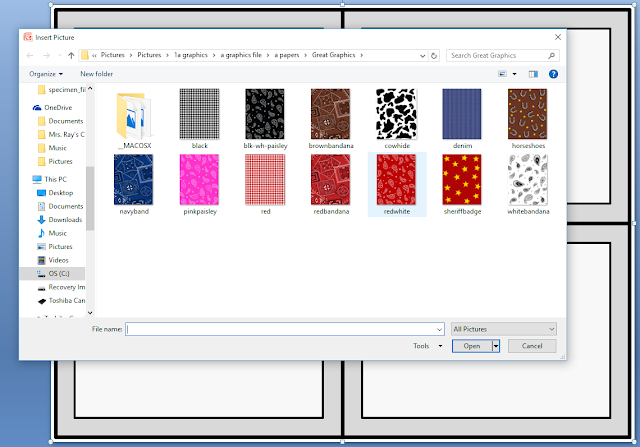
Now select "format" from the top menu - "shape fill" and finally - "picture".
You will need to navigate your way to your digital backgrounds. Double click on one that you like. This will fill in the grey space of the task cards.

If your digital background has a print and is not a solid, you may want to adjust the tiling. For example - in the picture below - the paisley is WAYYYY too big.
To fix it up: Go into "Format" - select "Shape Styles" - "Fill" - "Tile texture as picture" and finally - "Scale x" and "Scale y"
You will need to play around with the percentages in the x and y scale. Some designs need only a little adjustment, some need a lot. I always keep the percentages in both fields the same so that the design is proportional.
Voila! There you go - you now have some awesome task cards! Adjust the settings of the text boxes to your desired font size and style and then duplicate the slide to create as many task card pages as you will need before you start typing.
Duplicating the slide is simple - just right click on the slide you want to duplicate (in the slide view on the left-hand side of your screen) and select "Duplicate Slide". Repeat this process until you have the desired number of slides. Hint: Create more than you think you will need - it is easy to delete the extras.
Easy as pie! The procedure is the same regardless of which slide orientation you use.
I hope this helps make creating colorful task cards a bit easier. My next post will be on providing you some links to some of my favorite FREE digital papers and clipart to further help you get started - so check back soon!


No comments:
Post a Comment